
“Cut-off” machining is the common machining for swiss type lathe machining.
The cutting tool requires a holder/insert shape suitable for the machining scene. However, it is difficult to select the tool which one to choose.
In this column, we will introduce the points of tool selection by dividing them into 4 STEP.
Understand each feature and select a cutting tool suitable for the machining scene.
STEP1. Check the holder shank size and the diameter of the workpiece to be cut.
-
- Check the “shank size” of the holder.
The holder shank size to be attached differs depending on the machine. Check the specifications or instruction manual of the machine.
- Check the “shank size” of the holder.

-
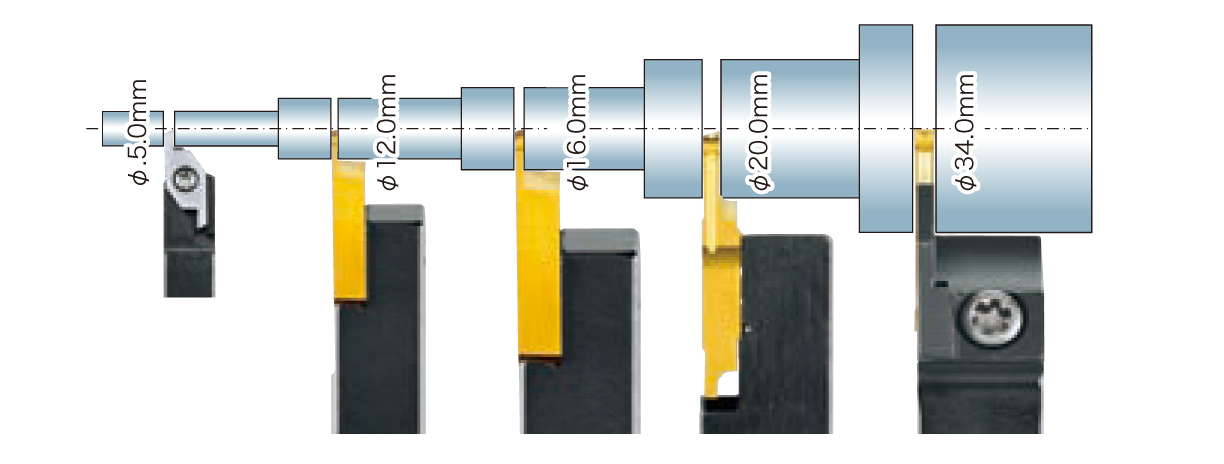
- Check the “material diameter” and “workpiece diameter during cut-off machining”. This is an important point to prevent interference between the tool and the workpiece.

-
- Finally, select the corresponding cutting tool from the catalog. Reference: 2020-2021 NTK Cutting Tool Lineup
STEP2. Select the holder
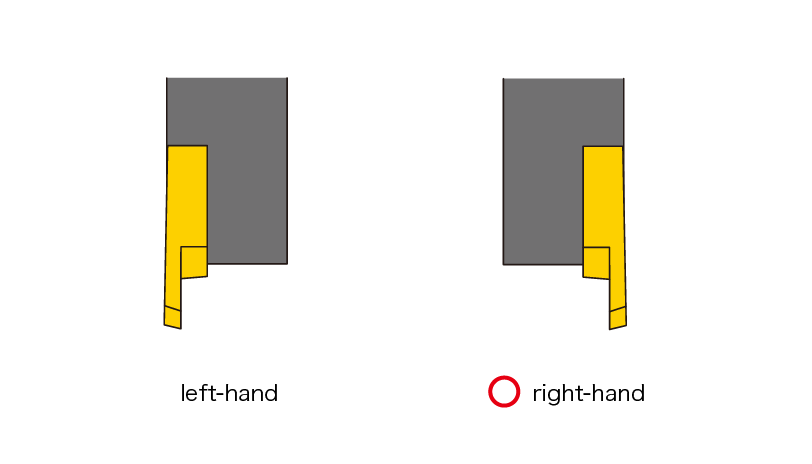
The tool has “left-hand” and “right-hand”.
Basically, “right-hand holder” is used, but “left-hand holder” is used when ” right-hand holder” cannot be used depending on the machining scene.
Scenes in which the left-hand side is used include, for example, the following patterns.
① When the total length of the workpiece is short and the workpiece cannot be gripped by the subspindle chuck.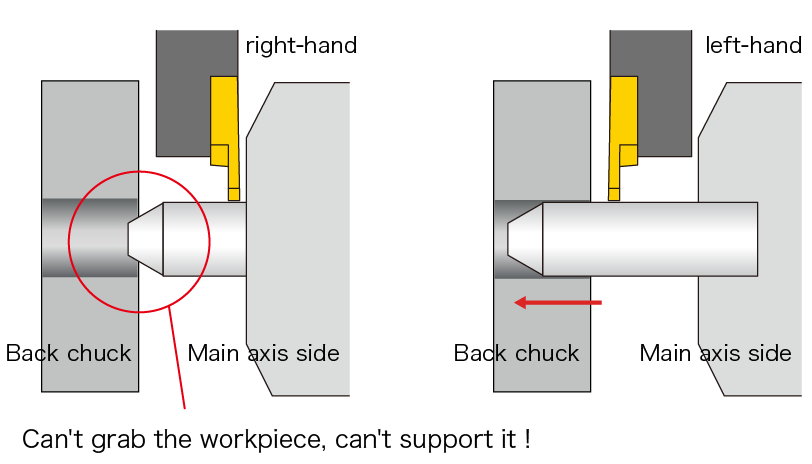
② When using a cam-type automatic lathe
The cam type automatic lathe rotates the spindle in the reverse direction, so the left and right directions will be changed.
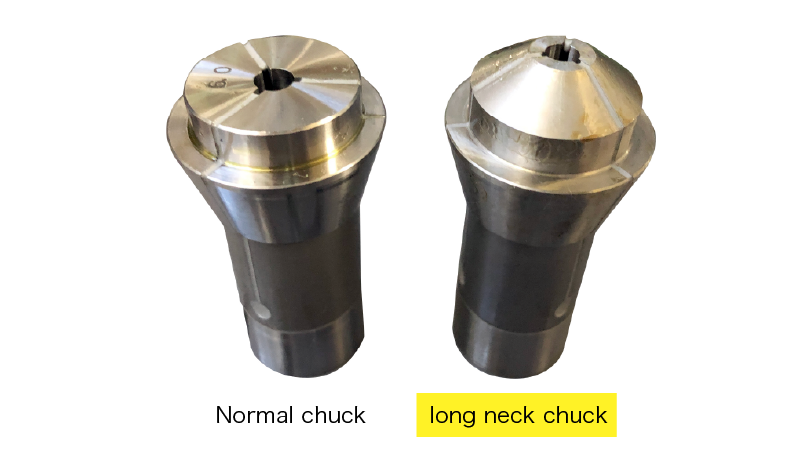
※-What is the -SUB type holder ?
The “-SUB Holder” is a holder intended for use with a long neck chuck (special item).
-SUB holders can avoid intervention between the chief chuck and the holder, and can be processed in a position closer to the guidebush side.
This holder is ideal for cut-off machining with weak workpiece rigidity.
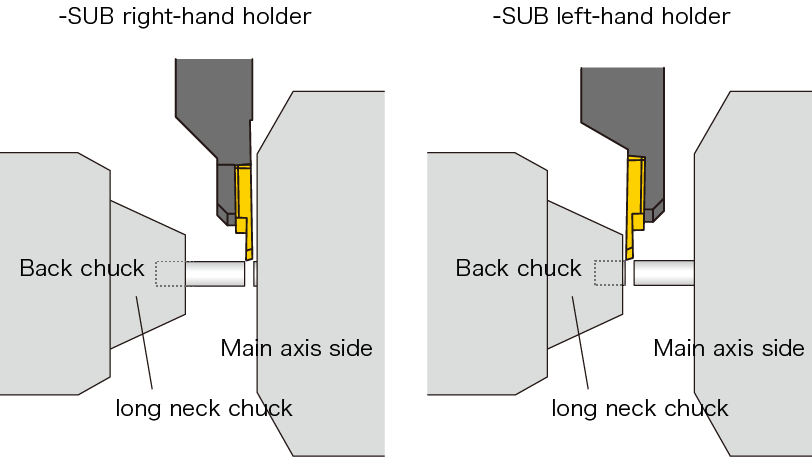 ※ If the total length of the workpiece is short, use the-SUB holder “left-handed”.
Here is the SUB holder lineup.
STEP3. Select the insert shape
After selecting the holder, select the insert.
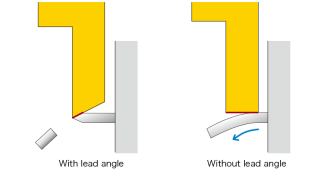
There are two types of insert shapes : “with lead angle” and “without lead angle” at the cutting edge.
Basically, “insert with lead angle” is used, but “insert without lead angle” is used depending on the cut-off scene.
Without lead angle
Advantages of using inserts without lead angles ①
Compared with inserts with lead angles, cutting edge strength is higher and stable machining is possible.
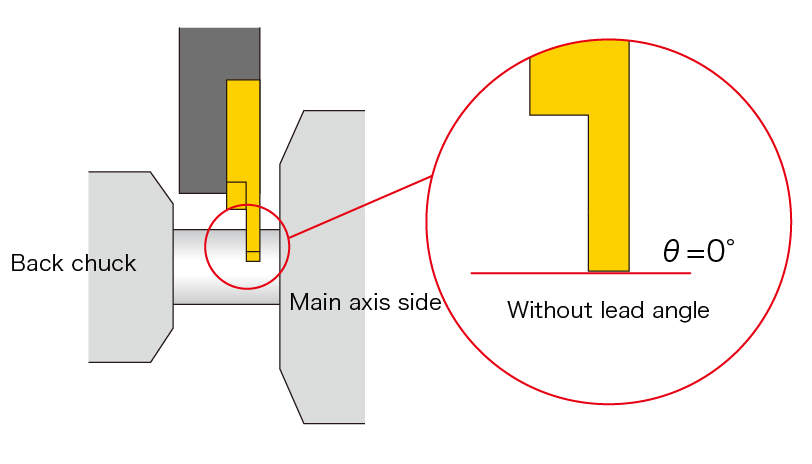
Advantages of using inserts without lead angles ②
Chips are evacuated in a straight line, which minimizes damage to the workpiece end face. Cutting edge damage tends to be evened out, resulting in relatively long tool life.
With lead angle
Advantages of using inserts without lead angles ①
It is often used when the subspindle chuck is not used and only the workpiece is cut off.
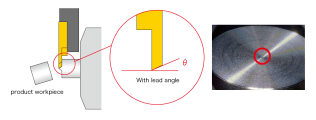 In the case of cutting off, the remaining boss on the end face of the product workpiece can be minimized by the lead angle.
Advantages of using inserts with leads ②
When machining small-diameter workpieces, the area where the cutting edge contacts the workpiece when it bites can be reduced. This reduces cutting resistance and suppresses workpiece deflection.
Precautions When Using Inserts with Lead Angles
Chips may not be discharged straight due to the influence of the lead angle, and the workpiece end face may be damaged.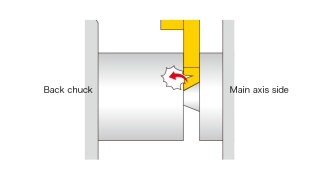
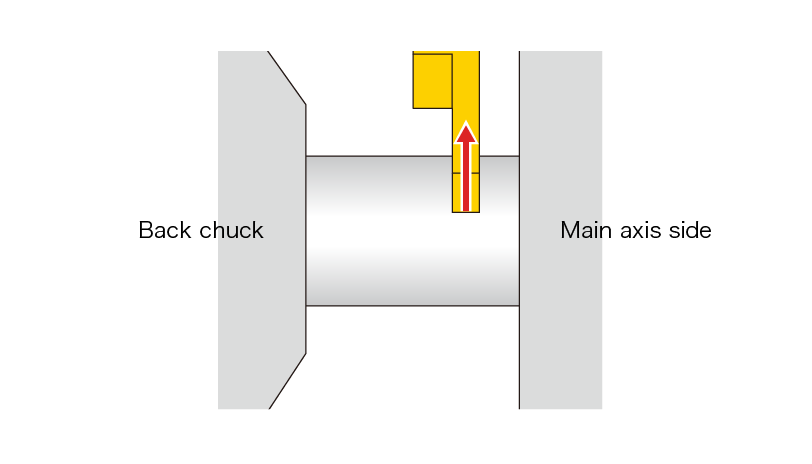
STEP4. Select the cut-off width
Finally, select the cut-off width of the insert.
The larger the cut-off diameter, the higher the cutting load. Therefore, increase the cut-off width to increase the insert strength.
The recommended cut width is “around 10%” of the material diameter.
Summary
In this column, we introduced the points for selecting the suitable cut-off tool.
We hope that it will be used as a guide when you have lost your selection of cutting tools.
The procedure introduced here is only a rough guide.
If you have any trouble with machining, please feel free to consult us at the following. We will make suggestions to suit your situation.