Do you know how ceramic cutting tools are made as described in my previous column,
“Two reasons why ceramic tools can perform high-speed cutting”?
Many people understand how carbide tools are made, but do you know how ceramic tools are made?
In this article, we will discuss the process of making ceramic tools.
1. Blending process
This is the process of making the base of the ceramic insert. It consists of two main processes.

① Crushing and mixing process
The raw materials, powder and water, are mixed and pulverized by a ball mill (grinder). The process of creating a homogeneous fine grain material makes the later firing process easier.
This stage is important for making hard and strong ceramic tools.
② Drying and granulation processes
Hot air is blown onto the material mixture from stage ① which causes the fine grains to coalesce into larger round forms.
This makes it easier to press the mixture in a later process and create ceramic inserts in various shapes.
2. Pressing process

This stage produces various insert shapes from the powders created in the previous process.
Powder is packed into a mold to which high pressure is applied to form inserts.
A pressing force of 1 – 2 tons/cm2 is applied in order to solidify the ceramic powder. To put it into perspective, this would be equivalent to a hippopotamus stepping on the insert mold.
Ceramics have a lighter specific gravity compared to cemented carbides. So, using the carbide pressing process would result in cracks and distortions of the ceramic after sintering. Therefore, the pressing process is exclusive to ceramic tools.
The insert pressing process compacts the ceramic material but there are still gaps between the particles and the inserts are fragile.
The process then moves to the firing stage.
3. Sintering process
This is the baking and solidifying stage for ceramic insert manufacturing.
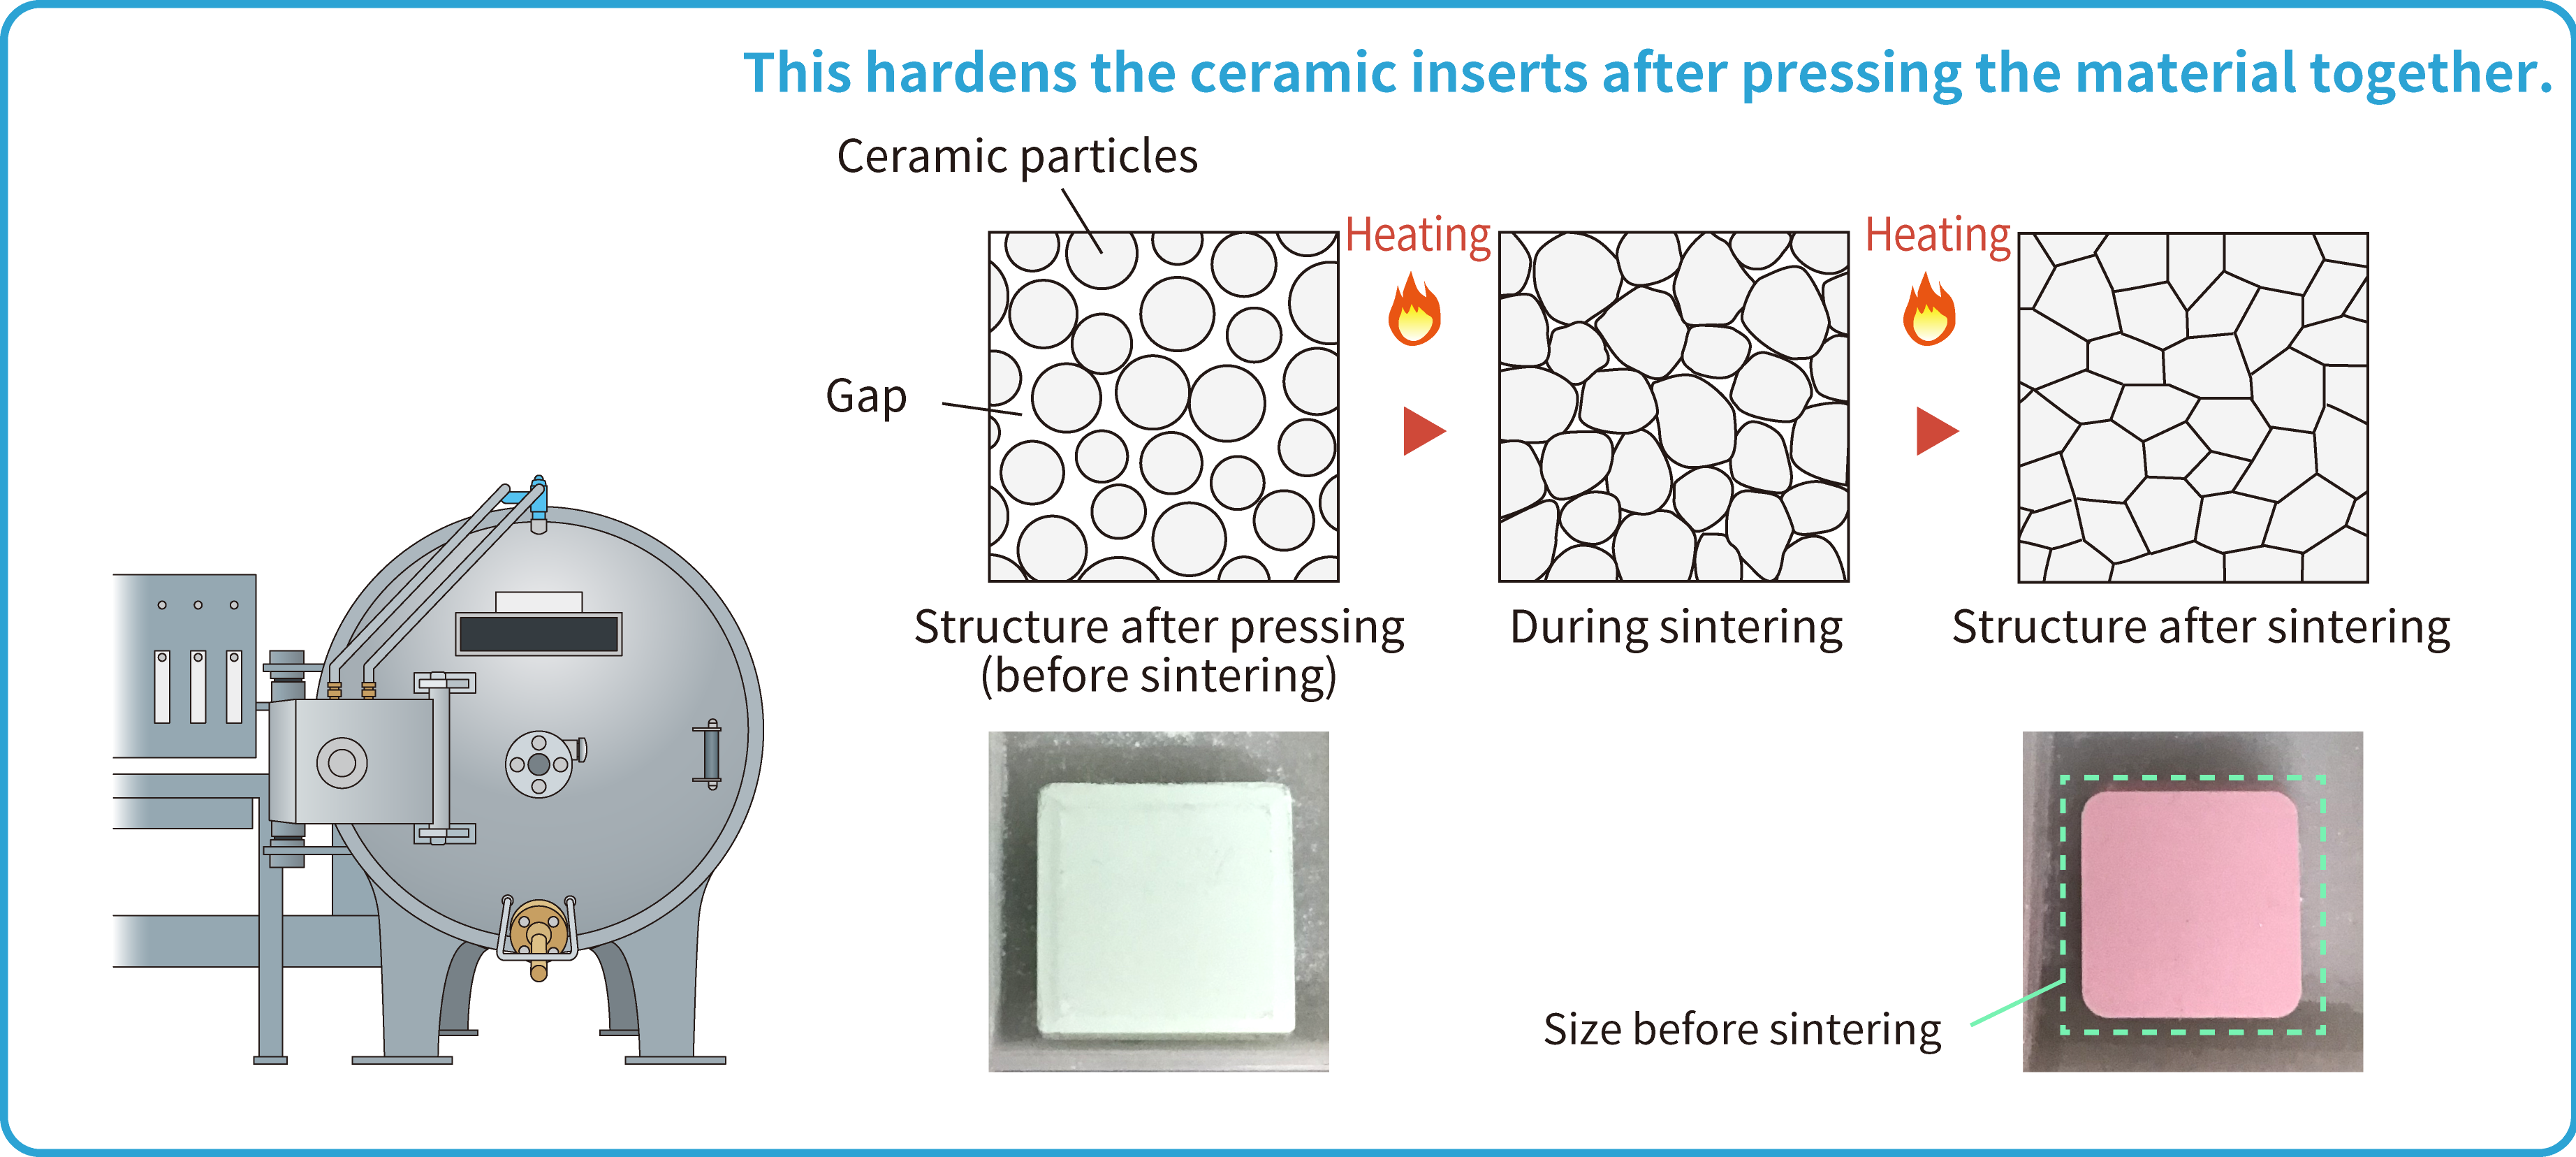
To make ceramic tools that can withstand high-speed machining, it is essential to manage sintering temperature and time more finely than cemented carbide tools.
This process produces hard, strong ceramic tools and also changes the color of the material due to a chemical reaction between the insert components.
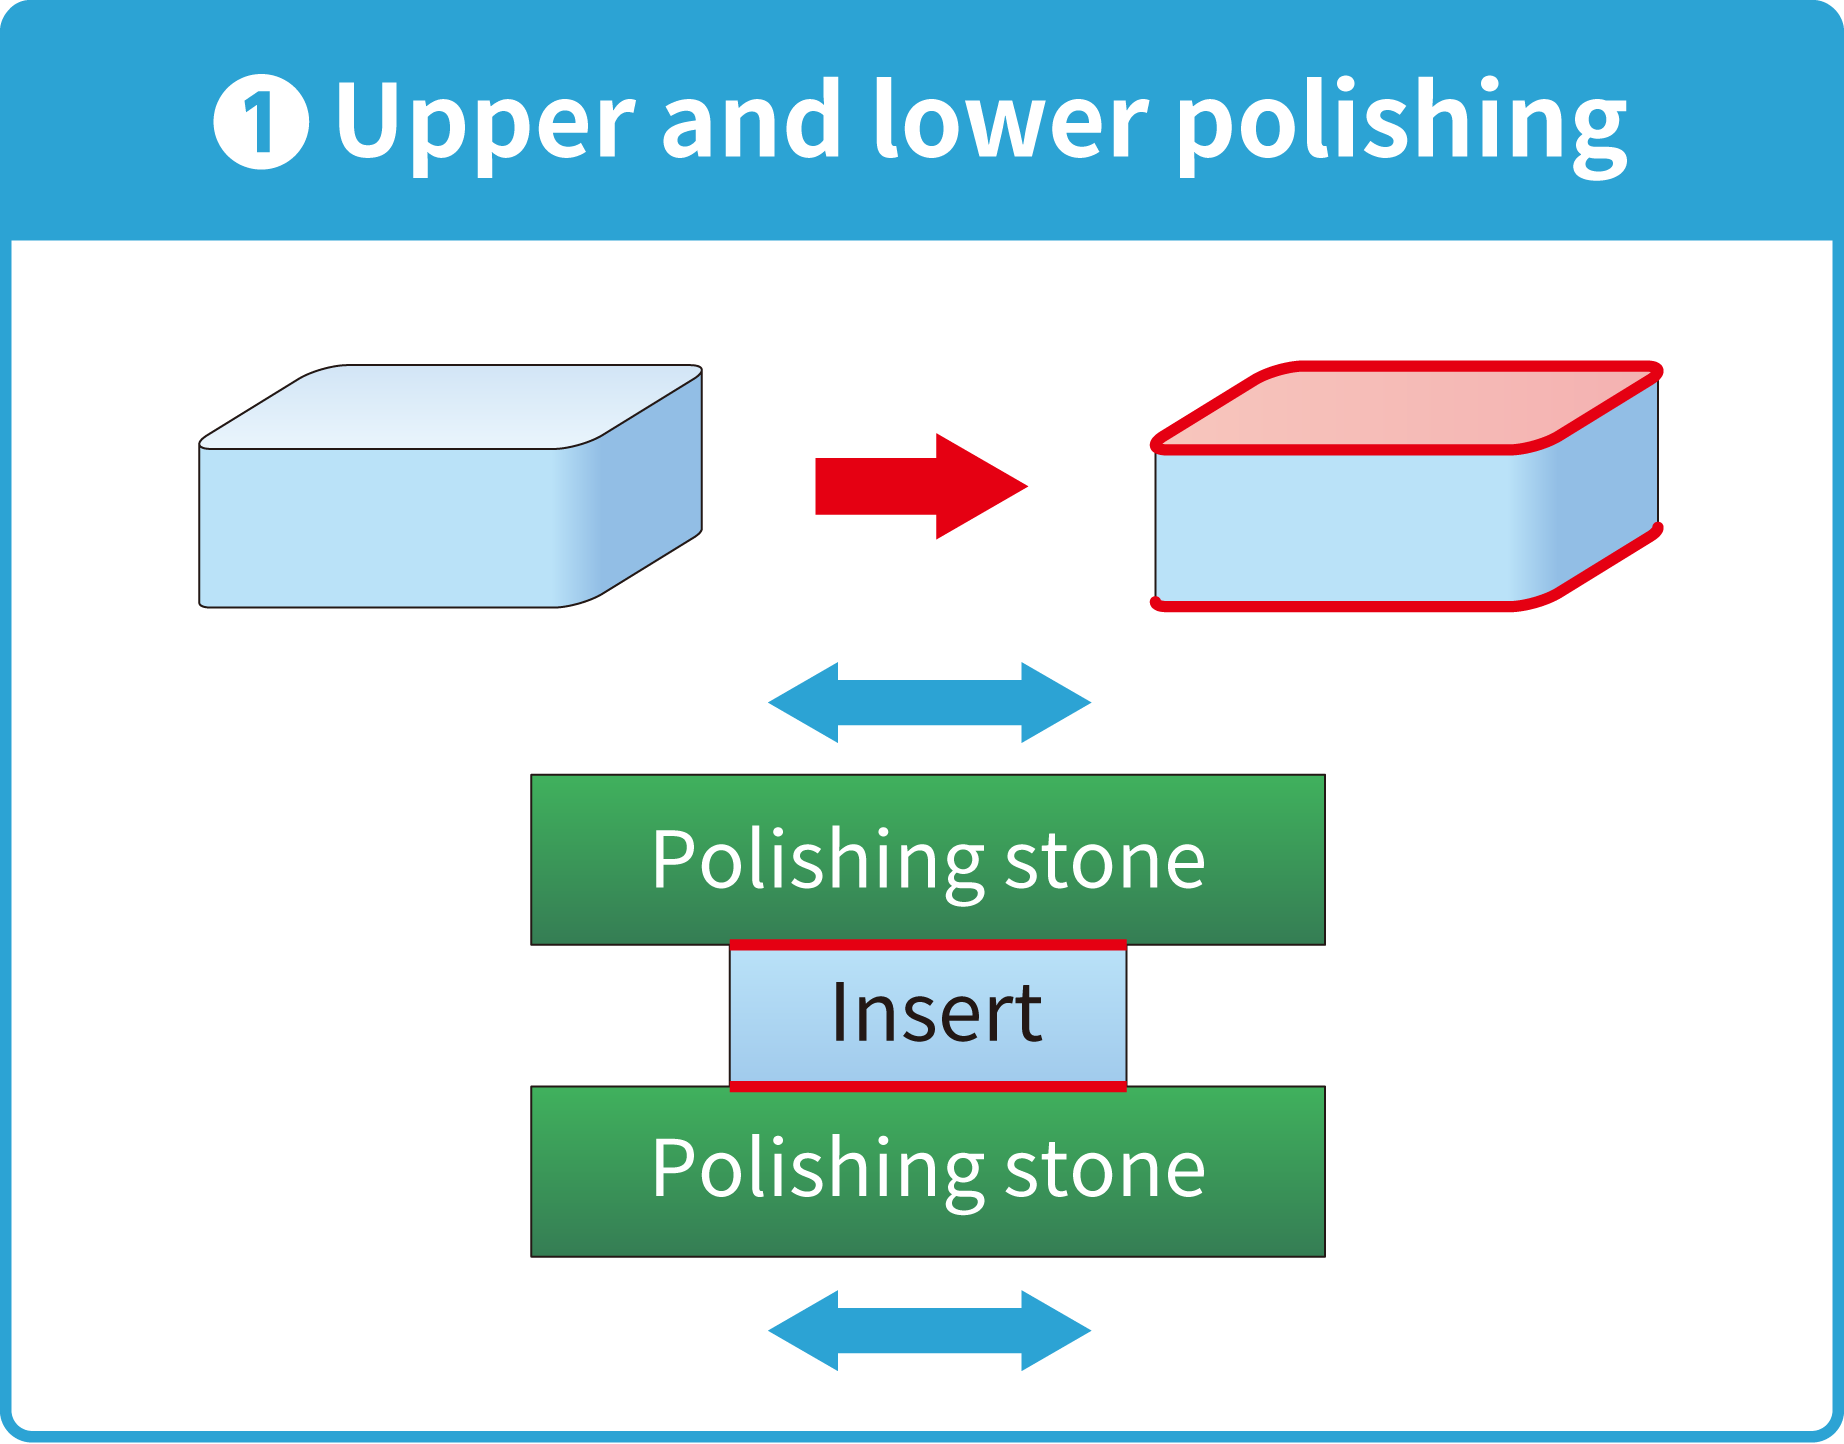
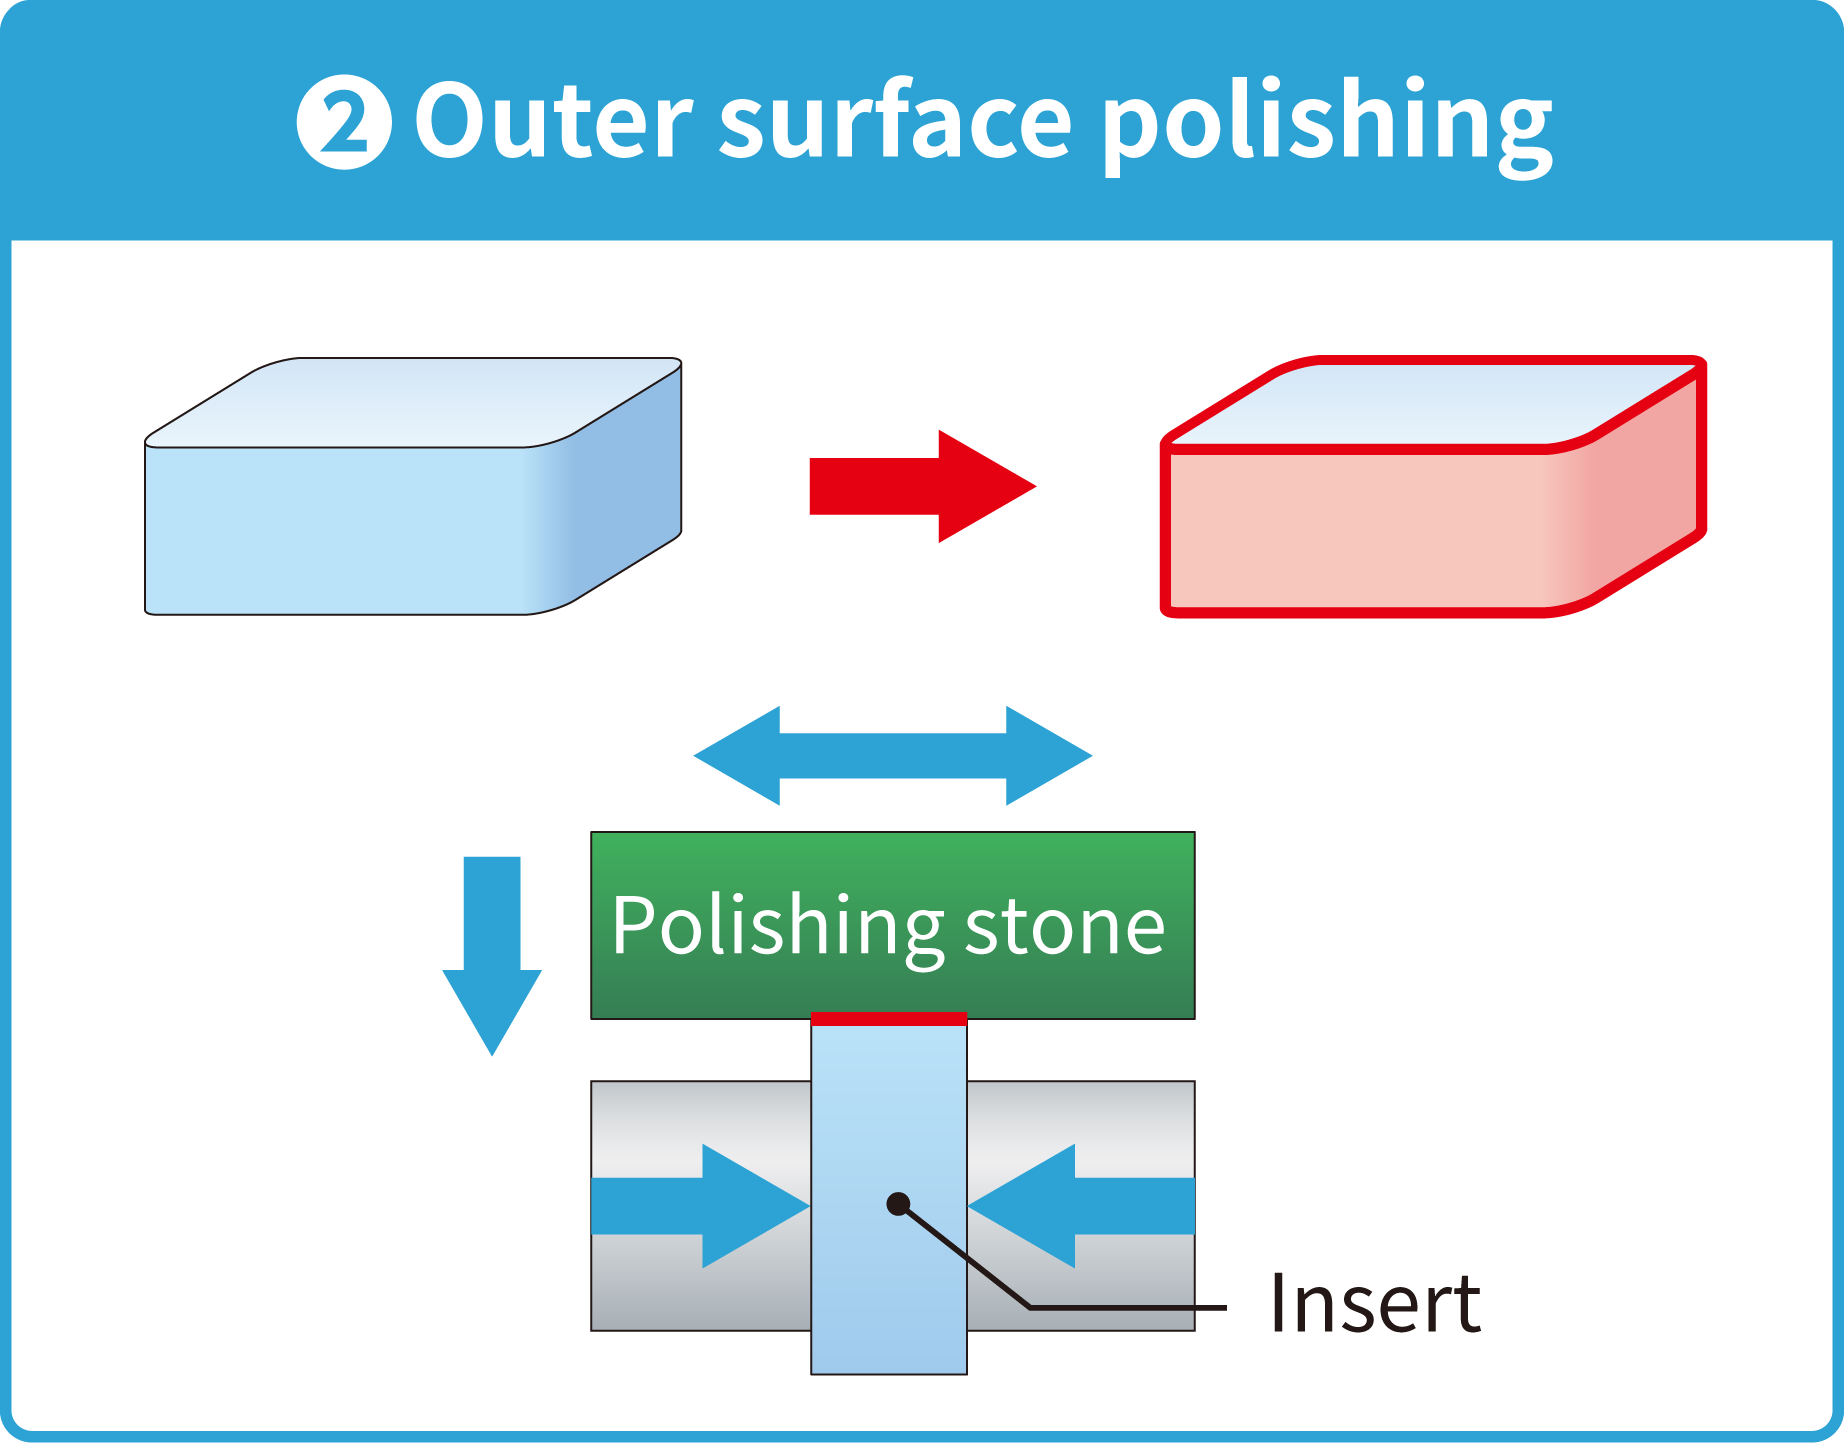
4. Polishing process
Polishing the inserts after the sintering stage will minimize dimensional variations of the inserts.
Polishing ceramic inserts is performed with the following process.
Images of the cutting edge grinding process
 |
 |
|
 |
|
 |
|
5. Coating
When machining cast iron at high speeds, wear may progress more rapidly due to an increase in temperature at the cutting edge.
Applying a coating will suppress the progression of wear and effectively improves tool life.

This time, we introduced how to make ceramic tools that we learn from scratch.
Click here for product & machining inquiries